Monday, April 27, 2020

Q.L. Tutorial to Make an A.B. Mask Designed by a Nurse (Part Three)


Before we finish the directions on making these wonderful A.B masks designed by a nurse, I wanted to show you two of the masks that have reached family members in the West.


 Using one of the two bias strips on which you have press one side under, find the middle, and pin the side you did not press under on top of the  dart on the WRONG side of the mask. Continue pinning the tie to the rest of the mask.


Using a quarter-inch seam, sew the tie to the mask.


Now, press under the opposite sides of the tie and the very ends which should be the same length on both sides of the mask.

Just as you did on the sides of the mask, pin the side you just pressed over onto the RIGHT side of the mask.


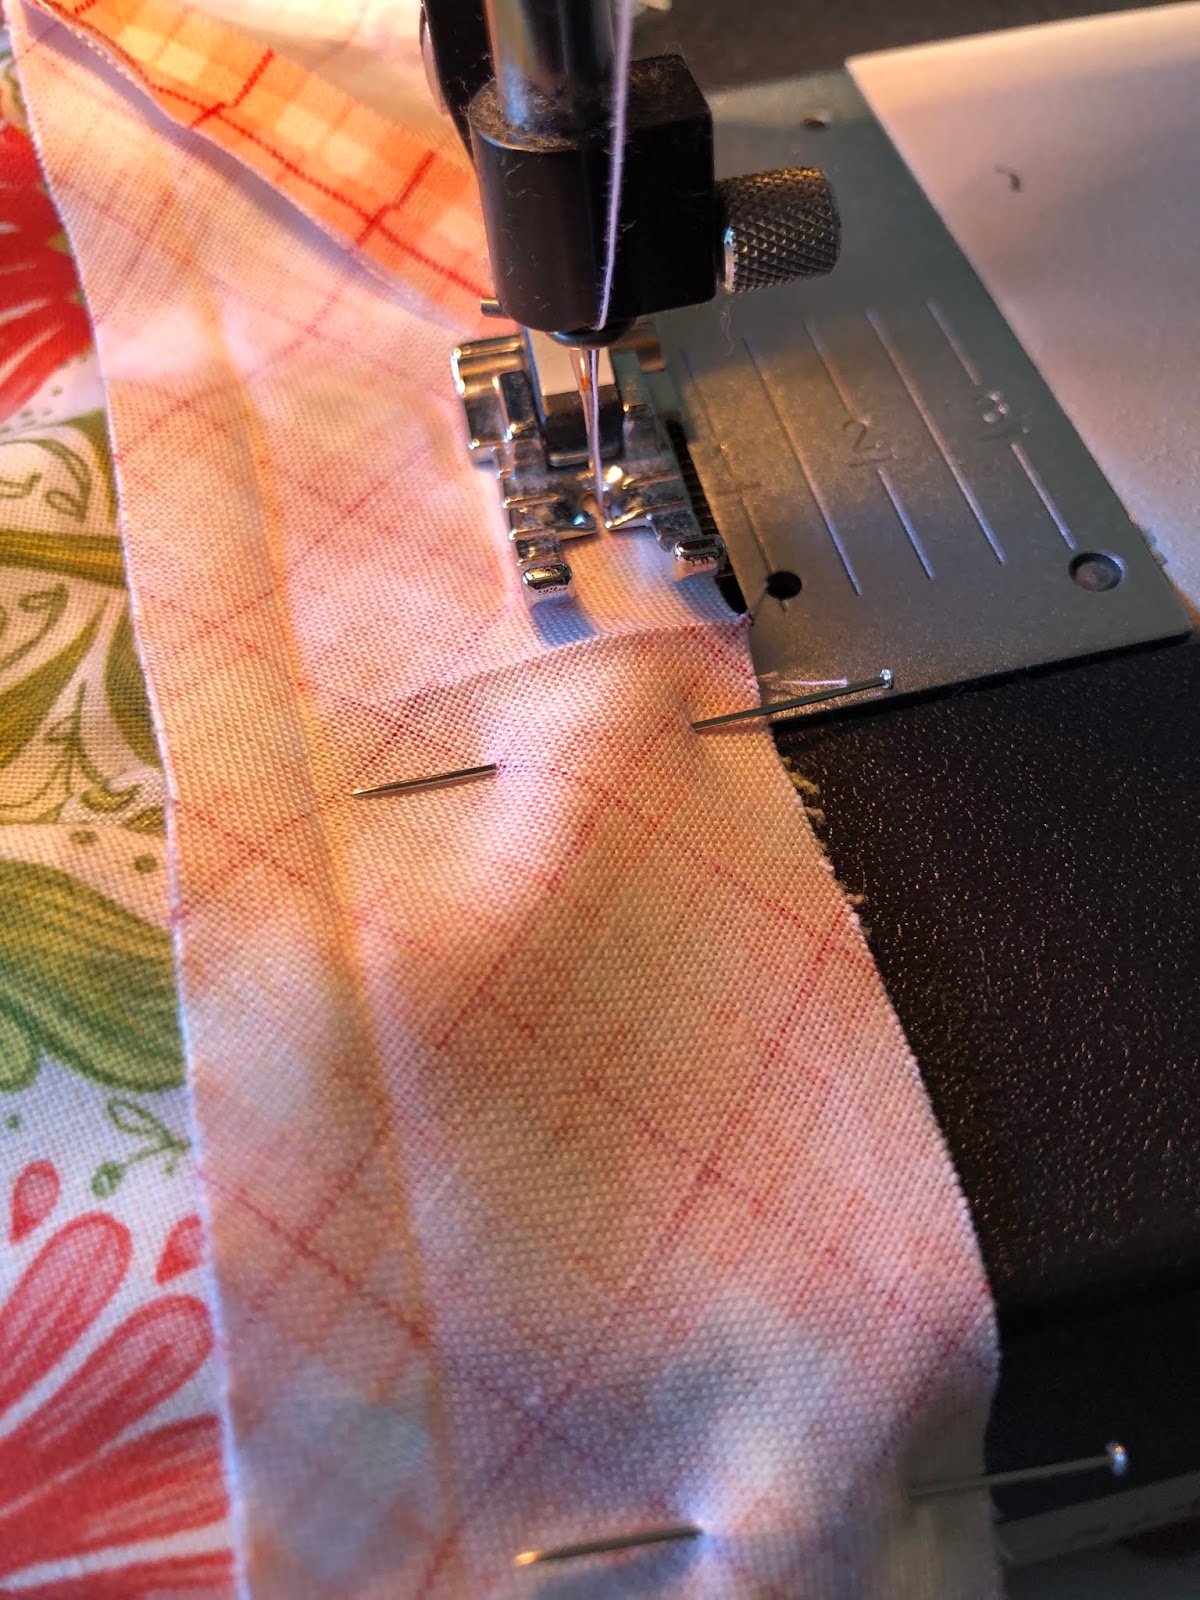
Continue pinning the two sides of the tie together until you reach the end of the tie.


Fold the end in one quarter inch.


 Fold the two sides in. (Yes, I know.  Just do the best you can.  You may have to shove anything that sticks out back into the fold with a pin.)


Pin the end of the tie.


 Now pin the other side of the tie the same way.

 Once you are all pinned, stitch from the end of one tie, across the mask, and onto the other tie.  Repeat this process for the tie and binding along the bottom of the mask.  All done!
Good luck and please feel free to email if you have questions about the process.

Important note:  It should not have to be said, but  a nurse put these directions online as a way to allow people to protect themselves and their families.  Please, don't make these masks to sell.  I was very disheartened to see masks made using the pattern put up by the Deaconess Hospital in Boston for sale online by enterprising crafters. Please don't dishonor these fine people who have shared their knowledge with us by turning around and trying to make a buck.


Q.L. Tutorial to make an A.B. Mask designed by a nurse (Part Two)


I've been working to make lots of these A.B masks designed by a nurse for family and close friends.  This set was for my neighbors who are huge fans of Star Wars and Harry Potter.

In the second part of the tutorial, I will show the use of continuous bias binding for the edges and the ties.  I've shared this magical source before called the Quilters Strip Ticket. (I'm not putting a link in because I don't want to favor one source over another.  It seems that just about every website that sells sewing notions carries them.) If you are a quilter and don't own one, it will be the best less-than-five-dollars you've ever spent.  One side provides detailed drawings of the construction and the other side is filled with charts telling you what size square you need to cut the width of tape you want.  In the case of the masks, a 13 1/2-inch square provides the exact amount of  one and a half inch tape you will need for one mask.


 Whether you use the Quilters Strip Ticket or the method
in the nurse's directions, the ends of the continuous bias will
end in a 45 degree angle.  I use these ends to bind the sides of
the mask. Pin in the bias to the WRONG side of the mask.  Once you've done this, you can trim off the excess.  Using a quarter-inch seam, sew it in place.

 Press the binding up and then press under one quarter inch.


Fold the binding down over the pleats on the RIGHT side of the mask and sew close to the edge.  Trim binding even with
 the edges of the mask. Repeat for the other side of the mask.
This gives a nice finished look to the front of the mask and, yes, I know it's two steps, but this way you don't have to
 worry about trying to catch both sides of the binding if you
try to sew it in two steps.


 Cut the remaining bias strip in half and press one side under one quarter inch.

Finally, fold each of the strips in half and press to mark the
center. When you attach the strips, you want to center them
in the middle of the mask so your ties are even.

In Part Three, the top and bottom of the mask will get bound
and the ties created.


Thursday, April 23, 2020

Q.L. Tutorial to make an A.B. mask designed by a nurse (Part One)


 Like many quilters in this time of need, I've given over much of my studio time to making masks.  Elastic has become like toilet tissue to find, so while waiting for a spool I ordered to arrive, I decided to try my hand at some of masks with strings.  A friend in New Jersey pointed me towards this pattern, A.B. mask for a nurse by a nurse.  It makes a really good, well-fitting mask.  I've made some changes to the construction, especially in the area of the binding/ties and since I've been asked about it by other sewists, I decided a tutorial was in order.


 Step one is to go to the site above and print out the pattern.
(Q.L. amendments: Using polycarbonate, I cut out two little templates that make it easier to mark the two darts on the folds of the front and back of the mask.  I also made a template to mark the side pleats.) Fabric should be 100% cotton.  I have been using different fabrics for the masks and the ties and have dipped into my basket of conversation prints.  You are cutting the mask pattern on the fold, so if your fabric is directional, keep that in mind.  The top of the mask is the side with the long dart and it goes over the nose. The opposite side with the short dart goes over the chin.


With the front and the back of the mask still folded in
 half, mark the long and short darts. Sew along the marked
lines.  Since you will be clipping the darts, stitch back and
forth at the end of each dart to strengthen them.  Clip each
of the darts nearly to the point


Press each of the darts open and then, with WRONG
sides together, pin the front to the back.                


Sew around all the raw edges with a seam allowance less
than a quarter inch so that you can cover this stitching
when you attach the binding.


Next, mark the pleats.  (I'm showing this with
another fabric because the little template
shows up better on the dark fabric.)  Using the
longer dart as the top, make sure all the pleats
point toward the short dart.


Sew down the pleats on both sides stitching right on top of your previous stitching.

This is the end of the first part of the tutorial.  Next, we will make the bias binding using the Quilters' Strip ticket to cover the edges and create the ties.