Showing posts with label borders. Show all posts

Sunday, March 13, 2011

"Single Girl" Support Group: Joining ring sections, Borders and getting ready to quilt


As I mentioned before, this current quilt is the third version of the "Single Girl" pattern that I've made.  I have added thin borders to each of the quilts I've made because I wanted some visual space (and actual fabric) between the rings and the binding.  Above is the border on Jim's woobie quilt. The border on this quilt was the same as the background fabric and that's what I've done for Henry's baby quilt.  For Anna's wedding quilt, I used a similar color to the background fabric.

I left my hand in the photo for scale.  You can see that joining ring sections leaves you with barely one quarter inch of fabric.  Adding binding to this would mean it would end up right on top of the ring.


Two ring sections joined leaves only one half inch.

I have been using borders that are cut one and three-fourths inches wide.  Borders are measured at the center of the quilt.  See this tutorial on borders that do not ripple.

Sew with the border strip on top and then press towards the border.

This is Henry's quilt.  Four rings and borders works out to about 45 inches square.

Continuous bias binding is all made.  See tutorial for that here.  The green jungle fabric is the backing.

Monday, January 11, 2010

Another baby quilt


I spent some of the weekend working on both the One Million Books quilt (all titles now are written on the border strips) and cutting out a new Kaffe Fassett African stripe baby quilt.


Baby jungle animals for the back, polka dots for the border, and plaid fabric for the bias tape. I'm chain piecing and have about three rows completed. More pictures soon. I've posted about making this quilt pattern before. These are the posts on chain piecing, adding borders, pin basting, quilting, and adding bias binding.

Wednesday, February 18, 2009

Baby Quilt, Part 3


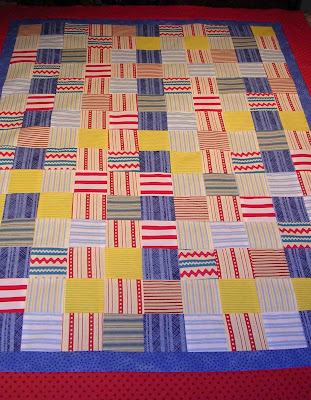
Making borders that lay flat is difficult for many people. They just cut a strip of fabric and sew it to the side of their quilt and then find that the border ripples or isn't the same length as the opposing side. Here's the 411 on flat borders: With the squares all pieced, measure across the middle of the work from edge to edge and cut two one and a half inch (or whatever width you like!) border strips exactly that measure.

Working on a flat surface to prevent stretching the pieced block edges, match the center of the quilt and the center of the border. Pin, easing to fit if necessary. If one side is longer than the other, put the long side on the bottom when you sew so the action of the feed dogs will help ease in the excess.

Press seam toward border.

Now measure the quilt longwise, (This will include the width of the two new borders.) and cut two one and a half inch borders exactly that measure.

Again, match centers, and working on a flat surface, pin borders to pieced edges. Sew and press seam toward border.
Follow exactly the same procedure to add the second border. (I used three inch strips for the second border.) Press the seams toward the final border.

I pin baste these baby quilts and use a hoop to hand quilt them.

Once this one is quilted, I'll do another post on the binding.