Saturday, March 12, 2011

"Single Girl" Support Group: Joining up the quarters to make a ring and some thoughts about "squaring up" the blocks

First off, let me apologize to those of you who have never made or don't even have plans to make a "Single Girl" guilt.  I will be moving on to other things soon.

I have been concerned about the postings on the Flickr group because it seems that many people are experiencing frustration with the construction of this pattern.  "Single Girl" is a very well constructed pattern, but not really one that you want to cut your teeth on if you are a newbie quilter or sewer.  The teacher in me can't help but want to address some of the questions, so here is a short tutorial on putting the quarters together into a ring.


You now have four quarters finished.  The next step is to join two of them together.


I pin the two sections of the ring first.  Fold down one side so that you can put the seams together, then pin.  Do the same with the other side, then pin the background areas together.

I start sewing in the background area.  It is much easier than starting the other way.  When you connect the two halves, you will have to start sewing near a ring section, but I have a little trick to make that easier, too.

Do not sew over the pins.  Stop your machine before you get to the pin and pull it straight out to the side.  When you get to the ring sections, sew onto the ring seam allowance, then pull out the pin.  Having your needle in that seam allowance before you take out the pin will mean that you have a better chance of keeping the seams of the ring lined up.

Press the seam open.  You want to minimize thick seams at this stage.
The two sides of your ring should line up.

Sew the other two pieces in the same way so that you now have two halves ready to go together.
Fold down one side to line up your center seams and pin.

After the centers are pinned, I pin the two ring sections, then work my way to the center on each side pinning the background fabric.

When you join the two halves, you have to start with the ring side and with most sewing machines, the pin being so close is going to cause problems getting started.  Life up the presser foot and lower the needle into the fabric, then remove the first pin. Lower the pressure foot and begin sewing.  Press this seam open as well and your ring is complete.

Some thoughts on "squaring up the blocks"
Many people have posted on the Flickr group about squaring up the blocks both at the quarter ring and/or the finished ring stage.  Personally, I question the wisdom of this.  I put a ruler on the template for the outer background piece for the above photo.  Think about it.  Before you have seamed this piece, it is only 5/8 of an inch in width.  Take away 1/4 of an inch for the ring seam and another 1/4 for connecting it and you are not left with a lot of fabric. If you trim anything off to square up the block, your finished rings are going to be right on top of each other or even overlapping.  Personally, I think it is much easier to be accurate with your templates, cutting, and piecing, and skip the squaring off.

Saturday, March 05, 2011

"Single Girl" Support Group: Piecing an arc


The organizers of the "Single Girl" Quilt Along are taking turns sharing construction tips and techniques, so I thought I would join in the sharing.  All of us working on these quilts are using Denyse Schmidt's very well-designed pattern.  This is not a quilt that you can "fudge" on and get good results and this starts at the very beginning of the process.  Since I'm working on my third "Single Girl" quilt, I am speaking from experience with the pattern as well as nearly 50 years of sewing.  Accuracy is extremely importance from tracing templates, to cutting fabric pieces, to maintaining a quarter-inch seam in piecing.

Because you are piecing curves, the pieces do not line up perfectly as they go when you are piecing squares.  I've shown the quarter-inch gauge next to the little corner of the fabric that hangs out when you start to piece.

The first two pieces are sewn together and pressed. They should be even at the top and bottom.

I press all the seams in one direction. Pressing is something else that is important.  Not only does it make your piecing look nice, it helps with accuracy when piecing two sections together.


Here's another view of the little tail of fabric.

If you are having trouble getting the pieces even at the top and bottom, try this little test.  Put two pins parallel to the edge of the fabric right where your quarter-inch seam will be.

Next, flip open the fabric to see if the two pieces are even at the top and bottom.  Once you've sewn a few rings, you will get better at "eye-balling" where the pieces need to go.

I sew the larger quarter circle piece to the arch first.  I fold it in half and finger press it at the center.

Next, I fold the arch in half and finger press it at the center.

I marked the photo with a red line so you can see where the creases are.

Bring the two creases together with right sides together and pin.

Pin one edge.  The arc and the background fabric should be even.


Next, pin the other edge.

If you have "fudged" with the templates, the cutting, or the piecing, this is where it will all come to roost.
If you've been accurate, the arch and the background pieces should go together without much fuss.


This is a quarter-inch foot.  If you are a quilter, it is worth every penny it may cost to purchase one for your machine.  It eliminates guessing or the need to mark a quarter inch seam line.  Get the right tools for the job.

I press the seam toward the background pieces.  It will minimize a bunchy-looking seam.

To put on the smaller background piece, fold it in half and finger press at the center and then do the same with the piece you just sewed at the top of the arc.

Pin the center, then each of the ends and work to the middle.

The block after the final press.

SPRING!!!

The cherry blossoms are blooming and the other flowering trees are coming quickly behind them.  This is my maple tree in the backyard.


The tulips are up and about to show.


Parsley came back in the herb planter.
I saved the best for last--beautiful jonquils.

Thursday, February 24, 2011

"Single Girl" Quilt Along and Support Group

Thanks to my friend, Mary who blogs over at Mary on Lake Pulaski, I found out about the "Single Girl Quilt Along."  It was the brainchild of several bloggers, among them, Katy at I'm a Ginger Monkey, Nova at A Cuppa and a Catch up, and Megan at Lucy and Norman.  They have gathered a fairly large group of people who are all working on creating quilts using  Denyse Schmidt's wonderful "Single Girl" pattern.  There's a Flickr group, the "Single Girl Support Group," and the pictures are fantastic.  There are so many wonderful color combinations coming together. 

Since I'm working on my third "Single Girl" quilt, Mary figured I would be interested.  I have to get moving on my latest one because the baby I'm making it for was born last weekend!  Here's a small photo update.


Saturday, February 19, 2011

Finishing up the yoga quilt

My yoga quilt is nearly finished.  The binding was sewn on last night and today I am sewing it down.  I've decided to make a bag that will hold my mat and the quilt rather than making the small mat bag.  The baby quilts will take precedence for the moment, but I'll get working on the bag soon.

On the Sketchbook Challenge front, I've got an idea page started for the February theme which is "Opposites."  For more information about the Challenge, just click on the button to the right.

Here's the top with the label pinned in place.  How apropos that upward facing dog is so close.  It's a pose that reminds me how much strength I've lost.

Saturday, February 12, 2011

Thanks, some thoughts in praise of Susan Piver, and a little rationalization: an all-sorts blog post

Thanks to Rev. Danny Fisher for the nice shoutout on his blog concerning a great quote from Susan Piver that I posted on Facebook. It came from an interview she did with Jenna, the author of the blog, Drinking to Distraction and was in response to a question that dealt with issues of vulnerability.

"I think the attunement with your essential vulnerability is the same thing as attunement with your highest wisdom and your deepest creativity and your heart of hearts. It’s difficult to be human. It’s difficult to walk around with what we know is true, which is that we each have a raw and open heart that is without protection at any time."


I love her writing and I think she has a wonderful ability to home in on the heart of complex issues. I've written before about my own struggles with anxiety and Susan's words made me realize how much time I spend trying to protect myself from my various vulnerabilities.  This idea of making peace with them, embracing them as you do your wisdom, your creativity, and your own true heart, just took my breath away. At the same time, I can think of artists, writers, musicians, who have channeled their own vulnerabilities to produce stunning creative works.  Think of nearly any self-portrait by Frieda Kahlo. This is the most difficult piece for me.  Much work still ahead.

I know I haven't posted in days and days, but it's been crazy at school and we seem to have so much to do in the evenings that there's never any time then either.  Last weekend was our 34th anniversary and we had a lovely celebration.  I have been quilting on the yoga quilt when I've had any time at all and it's nearly finished.  Pictures of that will follow soon.

Saturday, February 05, 2011

One ring finished : the new baby quilt


Three quarters of the ring finished.

And finally, one ring all completed.  Back to the studio to make more rings.

Sunday, January 30, 2011

First quarter of a Ring: new baby quilt


This is the first quarter of the ring for the new baby quilt.  I think it will be really cute.  The "Single Girl" pattern is really one of my favorites.  Using lots of fabrics is something I love and each ring has 32 different ones.  We're off to the theatre this afternoon, but I'll do more piecing tonight before "Downton Abbey" starts.

Saturday, January 29, 2011

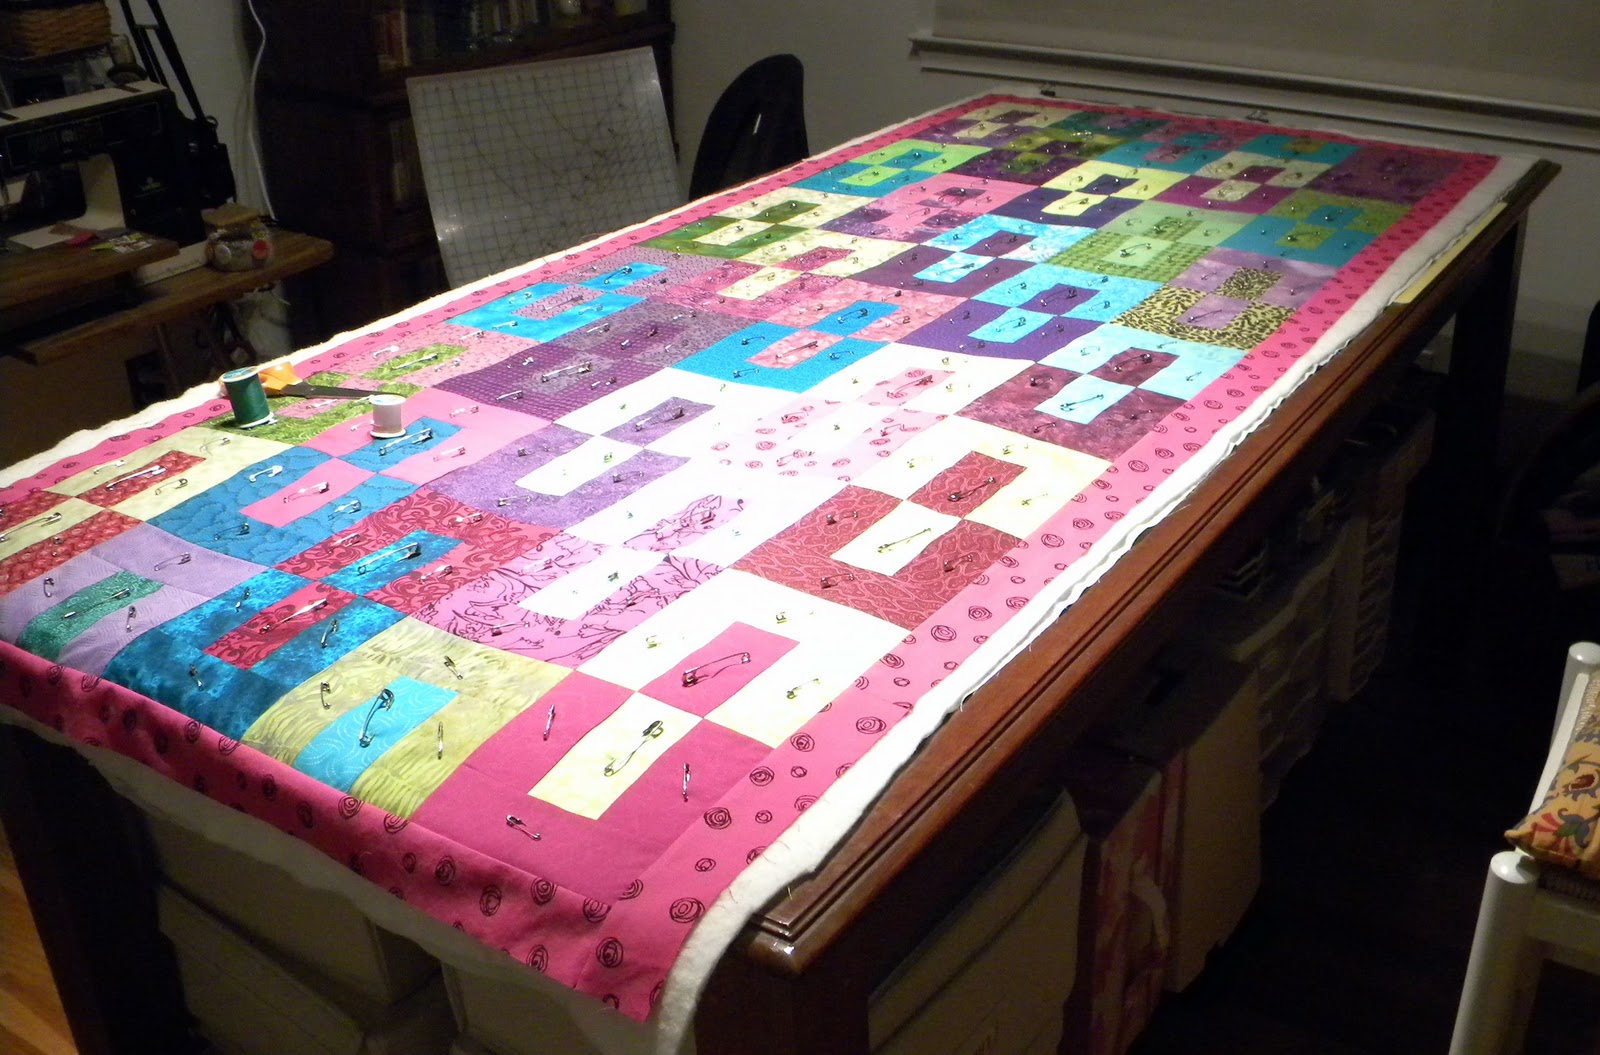
Pin basting the yoga quilt


The work table was cleared so I could pin baste the yoga quilt.  I just have to thread baste the edges and it will be ready to go into a hoop.  Tomorrow I will piece the first ring of the new baby quilt.


Thursday, January 27, 2011

"Gemini" is pieced and a new "Single Girl" begins

The "Gemini" top that I'm making for my yoga class is now pieced.  It was a bit like working with the bento box pattern when I made the wedding quilt last spring:  lots of colors and many stages of light and dark.  I nearly pulled back and made blocks of the same colors, but then decided to go for it.  I did have a few blocks sprinkled in that are lights and darks of the same color and generally, I think it works even if the colors are "bossier"(Nancy Crow's word) than those in the first bento box quilt I made for my niece.

As you can see from this detail, some of my fabric has been in my stash for a LONG time.  I'm slightly amused when I read the blogs of new, young quilters who are "destashing" fabrics that are maybe six months old.

This is the fabric pull and the pieces for a new "Single Girl" quilt for a baby.  It will have four rings.  This pattern is so wonderfully versatile in its look and size.
Here's the fabric map in progress with three-fourths of the fabrics present.

This is the last quarter of the ring on the background polka dot fabric.  The jungle print will be the back and the stripes (of course) will be the binding.  Looking forward to putting the first ring together.  We have a two-hour delay this morning, so I'm going to get started sandwiching the yoga quilt. 

Monday, January 17, 2011

Quilt for yoga class


This is the fabric pull for my new projects.  I bought some great Michael Miller fabric called "Yoga Monkey" to make a bag for my mat.


After it came, I decided I needed a quilt, too.  I'm using a pattern by Janine Burke called Gemini. She is one of the designers for a great site called Blue Underground Studios.   Their sample quilts make wonderfully strong color statements and they seem to love scrappy quilts as much as I do.  Their patterns, while based firmly on tradition, have a great modern feel largely due to their fabric choices.


There will be 60 different fabrics in this quilt--all from my stash.

This is a little bonus shot of the safety pin fabric pennants.  All of the photos today were taken with my newish camera.  I decided I'm just going to make myself use it and try to get better.  I'm still not thrilled with the focus, but I'll keep trying.  It also likes natural light better than artificial.  The colors are really off.  Back to the manual....

Friday, January 14, 2011

What I did on my snow day and a half

Finally, after four snow days, the kids are coming back to school today, albeit with a two-hour delay.  With the crazy system down here, teachers have to report on snow days unless you have personal days to use.  I did take off Tuesday and Wednesday morning because of the ice and got another baby quilt started during that time.  More later.  I'm off to Safety Pin Studio for a few more minutes.

Sunday, January 09, 2011

Beginning the new year with some little projects


Now that my niece's quilt is finished and on the way to her, I'm starting out the new year with some little projects.  I made two sets of these little pennants using Christmas fabric for my two dear friends here who are sisters.  They have little loops on each end so they can be hung on the tree.  I made a set for our tree, too.

I decided to make a set for Safety Pin Studio using some of the safety pin fabric in my stash.  I made them just like the large pennants but rather than using bias tape to string them, I just zigzag the raw top edges to the ribbon.

Speaking of stash, I've been hoarding all of these gorgeous William Morris reproduction fabrics for years and I finally decided to use one of them to make a cloth shopping bag for Anna.  Here's hoping your new year is happy, healthy, and productive.

Thursday, January 06, 2011

Confession: Cat quilt, not quite finished

OK, true confessions, here.  I didn't get my niece's quilt finished in time for Christmas, but I'm nearly there.  Rounding third and headed for home.  This is the back with the binding on the third side being sewn down.

This is the front in a place where the two binding fabrics meet.  (You may remember that I used two animal print fabrics to make the bias binding.  Check out the original post here.)

Sunday, January 02, 2011

A mash-up kind of morning

I've been having a really amazing mash-up kind of morning.  First of all, my sketchbook, open to the first page, has been projecting its emptiness at me since yesterday when the first theme for the Sketchbook Challenge went up and I got nothing in the way of ideas.  As I read my email and then opened Google Reader this morning, several great things happened:  the BBC news feed had an interesting article about diarists and as I was reading, I thought about how bloggers are really becoming the diarists of this age--little versions of Pepys, all of us.  At the end of the article was a marvelous quote by Virginia Woolf about what she wanted her diary to be and it really fitted what I want my sketchbook to be, so that first page is no longer empty. At least I now have an inspiration and a sort of framework.

The second thing that entered into this mash-up was a quote by Gardner Cox (American painter, 1906-1988):''

"I do a bale of sketches, one eye, a piece of hair.  A pound of observation, then an ounce of painting."

For me, who is often paralyzed by perfectionism that prevents me from doing anything because I fear it won't be perfect, this was a very important group of words.  I need to remember just to sketch.  It doesn't have to be perfect.  It's an observation, visual note-taking, not a final product.  Words are often inspirational to me and they will definitely be a part of this sketchbook.  And now,  feeling comforted and inspired, here we go.

Saturday, January 01, 2011

The Sketchbook Challenge

Jamie Fingal who blogs at Twisted Sister is one of my favorite art quilters.  Her work is original, imbued with her talent for drawing, and often displays her delicious sense of humor.  In a recent post, she announced her participation in a brilliant new project called The Sketchbook Challenge.  Each month, a theme will be announced and Jamie and the other organizers will share their sketches, talk about inspirations, and share techniques.  The brilliant part is that they are inviting their readers to join in the challenge and share as well.  I decided it would be a great way to get myself back into the sketching discipline in preparation for a summer class I plan to take that will involve lots of drawing.  If you would like to participate as well, go to the Sketchbook Challenge blog and pick up a badge, then get your drawing  tools ready and start drawing!